Beginner Tutorial: Depth & Occlusions
This tutorial will show you how to set up basic depth occlusions and place an object into the scene.
Note
The mocking system demonstrated in the video has been updated in ARDK 1.3. For details on mock mode changes see the additional Mock Mode video.
Preparation
This tutorial assumes you have a working Unity scene where you have imported the ARDK & ARDK-examples packages, and configured the project to run on a device. If you haven’t already imported the packages, in your project view:
Right-click the Asset folder > Import Package> Custom Package> select the ARDK package you downloaded > Import All
Right-click the Asset folder > Import Package> Custom Package> select the ARDK-examples package you downloaded > Import All
Update the build and player settings for building Android or iOS.
Please refer to the Getting Started With ARDK page for more details.
Steps
Create a new scene.
Create a new folder in your Asset tree called
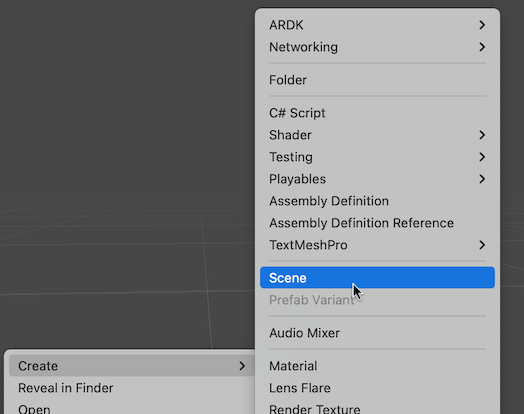
OcclusionsTutorial.Create a new scene in that folder. Right-click in the folder and select Create > Scene. Name it
OcculusionTutorial.
Add the ARDK Managers.
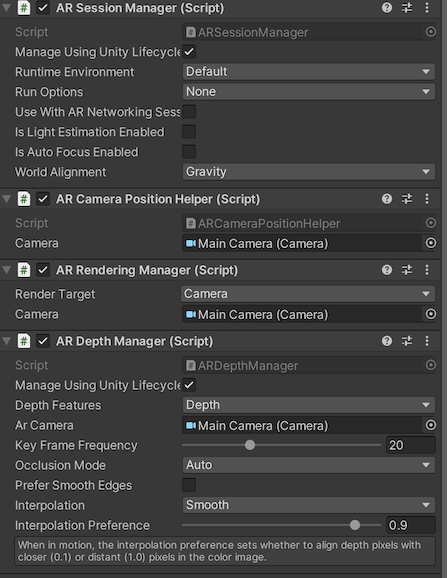
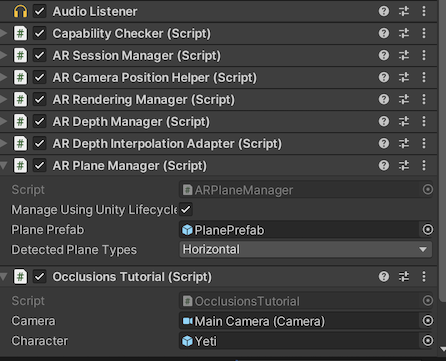
Add the following ARDK components to your scene camera:
AR Session Manager
AR Camera Position Helper
AR Rendering Manager
AR Depth Manager
Make sure that the camera is set on all of the managers.
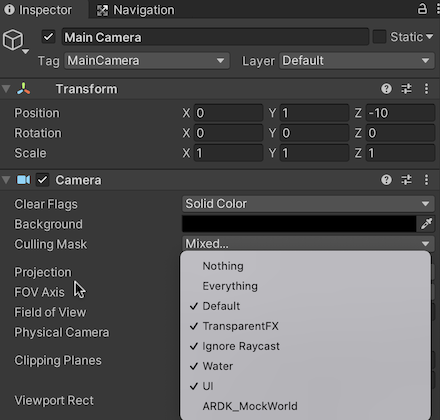
Update the camera settings.
Make sure to set the camera’s background to black.
Add in the mock scene so we can test in Unity.
Download the ARDK Mock Environments package from the ARDK Downloads page and import the package into your Unity project.
In the Lightship > ARDK > Virtual Studio window, go to the Mock tab and select the “LivingRoom” prefab from the Mock Scene dropdown. The prefab will automatically be instantiated in your scene when you run in the Unity editor.
Create our script for managing our CG asset that we want occluded.
Create the script in the same folder as your scene.
Add the script to the camera.
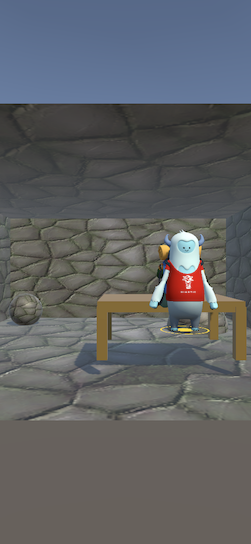
For the scene object, you can use a primitive like a cube or pull in any asset you like, such as the Captain Doty Yeti prefab in ARDK-Examples under
Common/Prefabs/Yeti.Place the object into the scene.
Set the object’s render layer to default.
Set the initial placement to be behind an object in the mock environment, like behind a piece of furniture. You may need to temporarily add the LivingRoom prefab to your scene to see where to place the object.
Our OcclusionsTutorial script
using System.Collections;
using System.Collections.Generic;
using UnityEngine;

public class OcclusionsTutorial : MonoBehaviour
{
        // Start is called before the first frame update
        GameObject _character;
        void Start()
        {

        }

        // Update is called once per frame
        void Update()
        {

        }
}
Verify Depth Manager settings.
By default occlusions are enabled when you add a depth manager. The occlusion mode will be set to Auto, which means that the depth manager will pick the best method available to your device. The default depth manager settings will work well for most use cases.
Here is a quick rundown of the depth manager settings:
Occlusion Mode
NoneNo occlusions
 Depth Buffer
The depth buffer will write values directly to unity’s zbuffer
 Screen Space Mesh
ARDK will create a screen space mesh from the depth buffer and overlay that in the scene as an occlusion mask.
 Auto
AutoPick the best method for your device, higher end phones support the zbuffer technique, lower will fall back to screen space
- Keyframe rate
This setting adjusts the rate at which ARDK will attempt to surface a new depth buffer.
By default it is 20 fps which is a good default for the majority of use cases. We interpolate the in between frames on devices that run at higher frame rates. This can be adjusted up or down based on quality vs performance.
- Prefer smooth edges
If this is enabled, for devices that support this feature, this will improve edge accuracy.
- Interpolation
There are 2 modes to run our interpolation:
Smooth - ensure we are interpolating every inbetween frame.
Balanced - mode used by earlier ARDK versions.
- Interpolation Preference
This value is passed into our algorithm for its back projection distance.
Add an AR Depth Interpolation Adaptor. Because we are manipulating a single object, we can use a script to dynamically adjust occlusion settings for the object. Add an AR Depth Interpolation Adaptor to our scene with the following settings:
Mode: Track Occludee
Occludee:
yeti_body_geo(or whatever scene object you’re using)
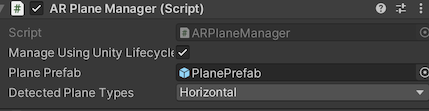
Add ARPlaneManager to position object based on screen input. For this example we can use planes for placement so we will add an ARPlaneManager to our scene. You can add this to your scene camera or wherever you like in your scene hierarchy.
Add a hit test function to move our character. To determine where to place our object we need to add code to do hit testing. We’ll update the script you created in step 5 with code that calls HitTest and passes in the screen touch location. If there’s a hit we move our object to that location and rotate it to face the camera.
Write the following script:
using System.Collections;
  using System.Collections.Generic;
  using UnityEngine;
  using Niantic.ARDK.Utilities.Input.Legacy;
  using Niantic.ARDK.AR;
  using Niantic.ARDK.Utilities;
  using Niantic.ARDK.AR.ARSessionEventArgs;
  using Niantic.ARDK.AR.HitTest;
  public class OcclusionsTutorial : MonoBehaviour
  {
          //we need the camera for the hit test
          public Camera _camera;

          //our character (yeti)
          public GameObject _character;

          //we need the session for the hit test.
          IARSession _session;

          void Start()
          {
                 //we will need to catch the session in for our hit test function.
                 ARSessionFactory.SessionInitialized += OnSessionInitialized;
          }

          //callback for the session starting.
          private void OnSessionInitialized(AnyARSessionInitializedArgs args)
          {
             //only run once guard
                 ARSessionFactory.SessionInitialized -= OnSessionInitialized;

                 //save the session.
                 _session = args.Session;
          }

          //per frame update
          void Update()
          {
                 //if there is a touch call our function
                 if (PlatformAgnosticInput.touchCount <= 0) { return; }

                 var touch = PlatformAgnosticInput.GetTouch(0);
                 if (touch.phase == TouchPhase.Began)
                 {
                         TouchBegan(touch);
                 }
        }
          private void TouchBegan(Touch touch)
          {
                 //check we have a valid frame.
                 var currentFrame = _session.CurrentFrame;
                 if (currentFrame == null)
                 {
                     return;
                 }

                 if (_camera == null)
                     return;

                 //do a hit test at at that screen point
                 var hitTestResults =
                     currentFrame.HitTest
                     (
                         _camera.pixelWidth,
                         _camera.pixelHeight,
                         touch.position,
                         ARHitTestResultType.ExistingPlaneUsingExtent |
                         ARHitTestResultType.EstimatedHorizontalPlane
                     );

                 if (hitTestResults.Count == 0)
                     return;

                 //move our character to the touch hit location
                 // Set the cursor object to the hit test result's position
                 _character.transform.position = hitTestResults[0].WorldTransform.ToPosition();

                 // Orient the cursor object to look at the user, but remain flat on the "ground", aka
                 // only rotate about the y-axis
                 _character.transform.LookAt
                 (
                     new Vector3
                     (
                         currentFrame.Camera.Transform[0, 3],
                         _character.transform.position.y,
                         currentFrame.Camera.Transform[2, 3]
                     )
                 );
             }
     }
Add the script to your Unity project:
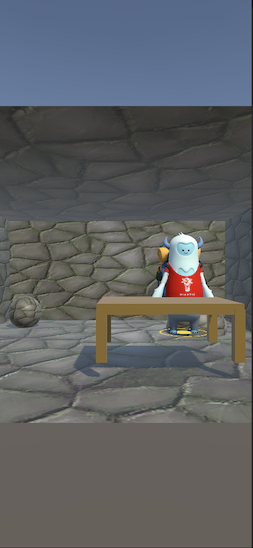
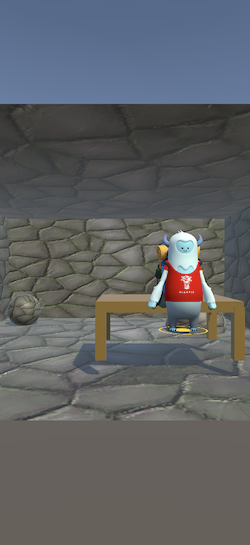
Test the app in Unity. Build and test the app in Unity and verify the object is being occluded properly.
Test the app on your device. Build and test the app on your development device and verify the object is being occluded properly.